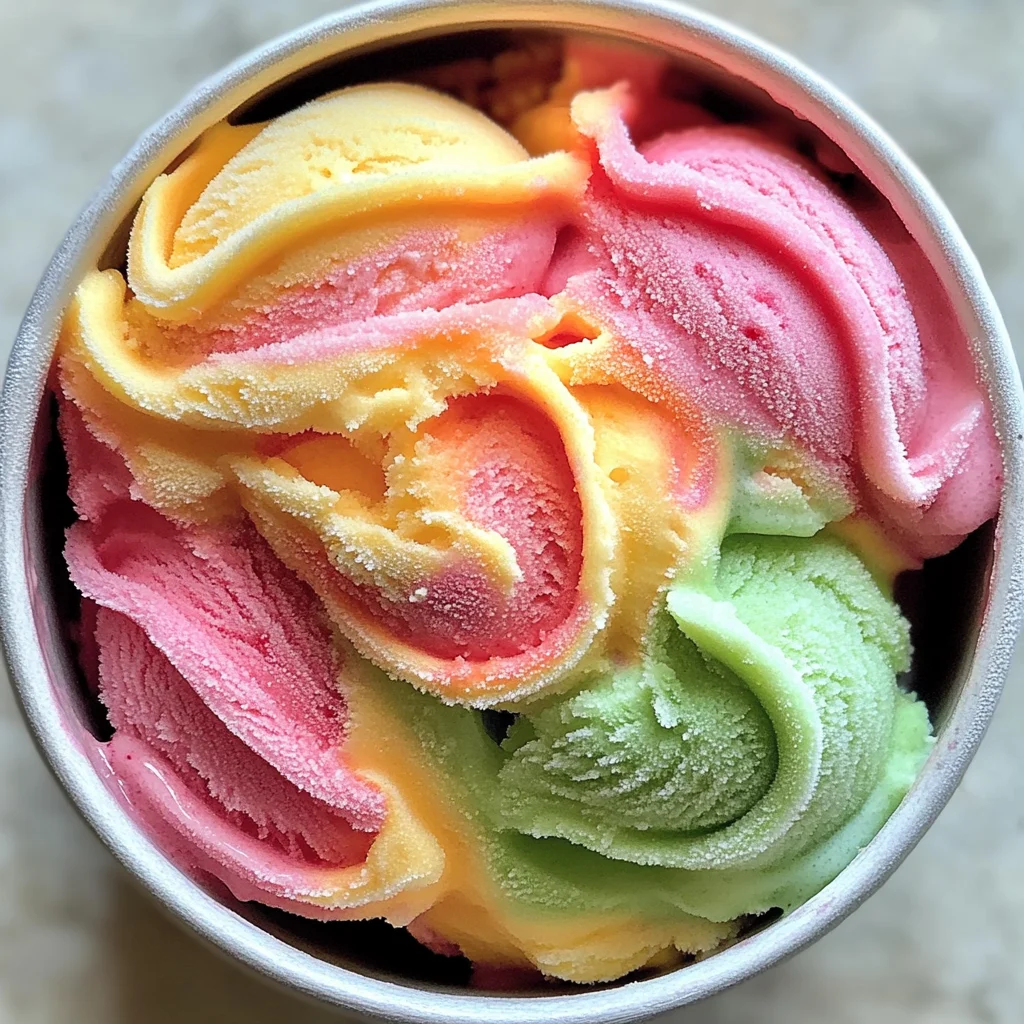
Homemade Rainbow Sherbet
Indulge in the vibrant and refreshing delight of Homemade Rainbow Sherbet, a colorful frozen dessert that captures the essence of summer in every scoop. This delightful treat is perfect for parties, barbecues, or simply a fun way to cool off on a warm day. With its creamy texture and customizable flavors, this homemade version outshines any store-bought option. Impress your guests and satisfy your sweet tooth with this easy-to-make sherbet that’s as pleasing to the eyes as it is to the palate!
Why You’ll Love This Recipe
- Delicious Flavors: Enjoy the vibrant taste of fresh fruits in every bite.
- Easy to Make: With simple steps, anyone can create this stunning dessert.
- Customizable: Feel free to experiment with different fruit juices for unique variations.
- Perfect for Any Occasion: Whether it’s a family gathering or a summer party, this sherbet fits right in.
- Eye-Catching Presentation: The colorful layers make it an attractive addition to any dessert table.
Tools and Preparation
To prepare your delicious Homemade Rainbow Sherbet, you’ll need some essential kitchen tools. These will help ensure that your sherbet turns out perfectly.
Essential Tools and Equipment
- Ice cream maker
- Saucepan
- Fine mesh sieve
- Mixing bowls
Importance of Each Tool
- Ice cream maker: This tool is essential for achieving the creamy texture of sherbet by churning the mixture as it freezes.
- Saucepan: A reliable saucepan allows for even heating and mixing of ingredients, ensuring everything dissolves properly.
- Fine mesh sieve: This tool helps create a smooth raspberry puree by straining out seeds for a refined texture.
- Mixing bowls: Having multiple mixing bowls allows you to easily divide and combine your mixtures without hassle.
Ingredients
For the Base Mixture
- 1 1/2 cups heavy cream
- 1 1/2 cups whole milk
- 1 3/4 cups granulated sugar (divided)
- 1 teaspoon vanilla extract
For the Flavors
- 3/4 cup orange juice
- 1/2 cup lime juice
- 8 ounces raspberries
How to Make Homemade Rainbow Sherbet
Step 1: Combine the Base Ingredients
In a saucepan, combine the heavy cream, whole milk, and 1 cup of granulated sugar over medium heat. Stir continuously until the sugar dissolves completely, which should take about 5-7 minutes. Once dissolved, remove from heat and stir in the vanilla extract. Let this mixture cool completely.
Step 2: Prepare Raspberry Puree
Blend 8 ounces of raspberries with 2 tablespoons of granulated sugar. Use a fine mesh sieve to strain this mixture, discarding any seeds. This will provide a smooth raspberry flavor for your sherbet.
Step 3: Churn the Base Mixture
Pour the cooled base into an ice cream maker. Churn according to manufacturer instructions until you reach a soft serve consistency.
Step 4: Divide and Color
Divide the churned base into two parts. Mix one part with 3/4 cup orange juice along with food coloring for vibrancy. In another part, mix with 1/2 cup lime juice and green food coloring.
Step 5: Layer and Freeze
In a container, layer the mixtures alternately between raspberry, lime, and orange flavors. Freeze for about 4-6 hours until firm. Enjoy your colorful Homemade Rainbow Sherbet!
How to Serve Homemade Rainbow Sherbet
Homemade Rainbow Sherbet is not just a treat; it’s a showstopper! Serve it up in fun and creative ways for your guests to enjoy. Here are some delightful serving suggestions that will enhance this colorful dessert experience.
In Colorful Bowls
- Use bright, fun bowls to bring out the vibrant colors of the sherbet. This makes each serving visually appealing and adds a festive touch.
With Fresh Fruit Garnish
- Top your servings with fresh fruit slices like strawberries or kiwi. This not only adds flavor but also enhances the presentation.
As a Layered Dessert Parfait
- Create a layered parfait by alternating scoops of sherbet with whipped cream or yogurt. This adds texture and looks stunning in clear cups.
Drizzled with Fruit Sauce
- Serve with a drizzle of homemade fruit sauce made from pureed berries. It pairs well with the flavors and adds an extra layer of deliciousness.
In Cones for Fun Serving
- Scoop the rainbow sherbet into waffle cones for a playful twist. Perfect for outdoor gatherings, this option is both fun and portable.
How to Perfect Homemade Rainbow Sherbet
Making the perfect Homemade Rainbow Sherbet involves a few key tips to ensure creamy texture and vibrant flavors. Follow these suggestions for an unbeatable treat!
- Use Fresh Ingredients: Fresh fruit juices yield better flavor than store-bought options. Opt for ripe fruits whenever possible.
- Chill Your Base: Ensure your cream mixture is fully chilled before churning. This helps achieve a smoother texture.
- Experiment with Flavors: Don’t hesitate to mix in other fruit juices or purees for unique tastes, like mango or blueberry.
- Layer Carefully: When layering the different flavors, pour gently to maintain distinct color separation.
- Store Properly: Use an airtight container when freezing to prevent ice crystals from forming on your sherbet.
Best Side Dishes for Homemade Rainbow Sherbet
Pairing side dishes with Homemade Rainbow Sherbet can elevate your dessert experience even further! Here are some fantastic options that complement this delightful treat perfectly.
- Fruit Skewers: Colorful skewers of mixed fruits like melon, pineapple, and grapes provide freshness alongside the sweet sherbet.
- Mini Cupcakes: Light vanilla or lemon cupcakes offer a soft contrast to the icy texture of the sherbet.
- Chocolate Dipped Cookies: Crisp cookies dipped in chocolate provide a crunchy element that balances the creamy dessert.
- Granola Bars: Chewy granola bars add fiber and energy, making them an ideal snack alongside sherbet.
- Cheese Platter: A selection of mild cheeses can create an interesting savory contrast against the sweetness of the sherbet.
- Pineapple Sorbet: For those who love frozen treats, serve another light sorbet that complements but doesn’t overpower the rainbow flavors.
- Vegetable Chips: Crunchy vegetable chips offer a healthy option that contrasts nicely with the creamy sweetness of the sherbet.
- Whipped Cream Dip: A fluffy whipped cream dip can be served alongside fruits or cookies for added indulgence while enjoying your sherbet.
Common Mistakes to Avoid
Making Homemade Rainbow Sherbet can be a delightful experience, but there are common pitfalls to watch out for.
- Overheating the Base: Heating the cream and milk too long can affect the texture. Aim for a gentle heat and stir until just dissolved.
- Skipping the Cooling Step: If you add flavors while the base is still warm, it can change the final consistency. Always let it cool completely before mixing in juices.
- Not Straining Fruit Mixtures: Blending fruits without straining can leave seeds or pulp in your sherbet. Always strain mixtures for a smooth texture.
- Using Low-Quality Ingredients: The flavor of your sherbet relies on fresh ingredients. Use high-quality fruit juices and ripe fruits for the best taste.
- Inadequate Freezing Time: Rushing to serve your sherbet before it’s fully frozen will lead to a slushy texture. Ensure it freezes for at least 4-6 hours.
- Ignoring Flavor Balance: Using too much of one juice can overpower others. Taste as you go to achieve a balanced flavor profile.
Storage & Reheating Instructions
Refrigerator Storage
- Store any leftover sherbet in an airtight container.
- It will last up to 2 days in the refrigerator but is best enjoyed fresh.
Freezing Homemade Rainbow Sherbet
- For long-term storage, keep it in a freezer-safe container.
- Properly stored, it can stay fresh for up to 2 weeks in the freezer.
Reheating Homemade Rainbow Sherbet
- Oven: Not recommended as sherbet is meant to be served frozen.
- Microwave: Use short bursts on low power if you want to soften slightly before scooping.
- Stovetop: Again, not suitable; enjoy it cold straight from the freezer.
Frequently Asked Questions
Here are some common questions about making Homemade Rainbow Sherbet that might help you along your culinary journey.
What fruits work best for Homemade Rainbow Sherbet?
Fruits like oranges, limes, and berries provide vibrant flavors and colors. Feel free to experiment with other fruits!
Can I make Homemade Rainbow Sherbet without an ice cream maker?
Yes! Pour the mixture into a shallow dish and freeze it. Stir every 30 minutes until it reaches a soft-serve consistency.
How do I achieve vibrant colors in my sherbet?
Use natural food coloring or pure fruit juices to enhance color while maintaining flavor.
What’s the difference between sorbet and sherbet?
Sherbet includes dairy ingredients, giving it a creamier texture compared to sorbet, which is typically dairy-free.
How long does Homemade Rainbow Sherbet last?
When stored properly in the freezer, it lasts up to two weeks. However, it’s best enjoyed fresh!
Final Thoughts
Homemade Rainbow Sherbet is not just visually stunning; it’s also deliciously refreshing. This recipe allows for endless customization options—try different fruit combinations or add herbs like mint for a unique twist. Dive into this vibrant treat and bring joy to your gatherings or simply enjoy a scoop on a warm day!
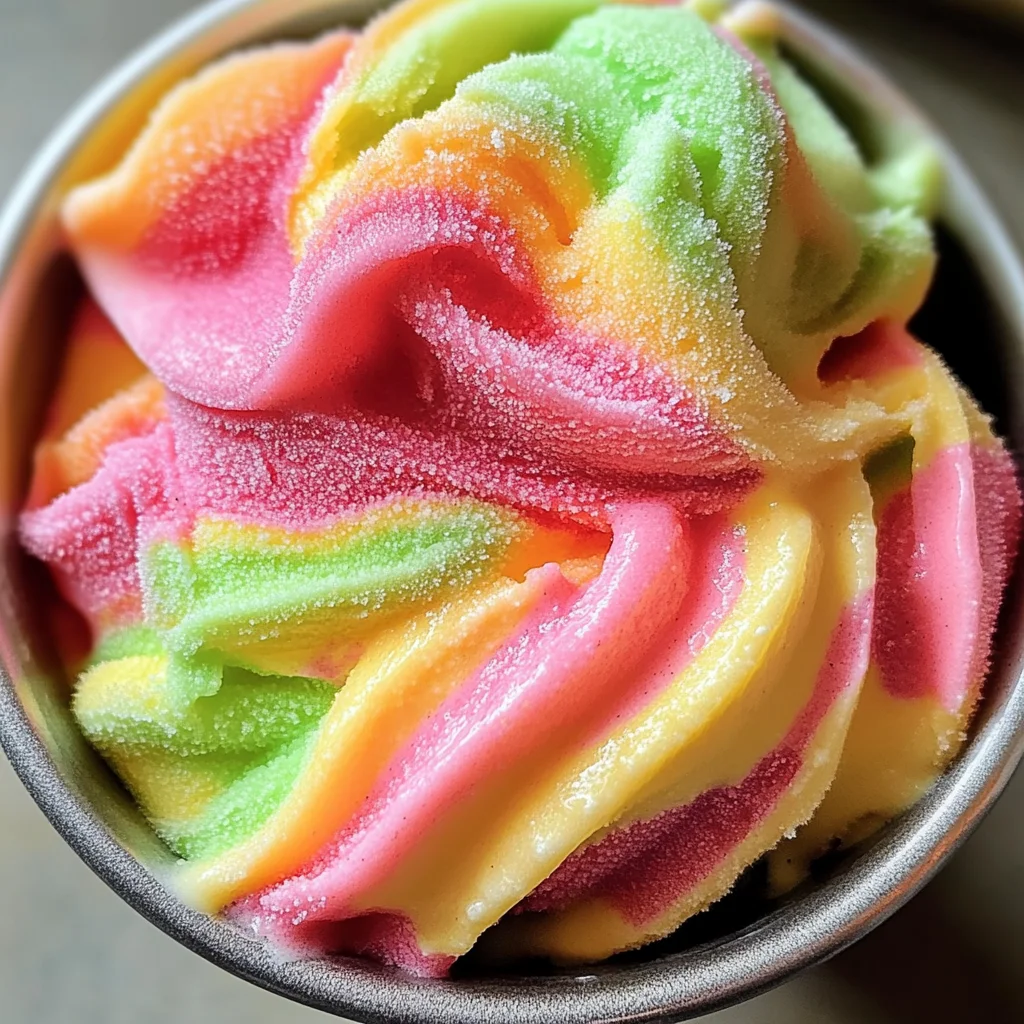
Homemade Rainbow Sherbet
Indulge in the refreshing delight of Homemade Rainbow Sherbet, a vibrant frozen dessert that embodies the essence of summer in every scoop. This colorful treat is perfect for gatherings, barbecues, or simply as a fun way to cool down on a hot day. With its creamy texture and customizable flavors, this homemade version elevates any occasion. Impress your guests with this easy-to-make sherbet that’s as pleasing to the eyes as it is to the palate!
- Prep Time: 15 minutes
- Cook Time: 10 minutes
- Total Time: 25 minutes
- Yield: About 6 servings 1x
- Category: Dessert
- Method: Churning
- Cuisine: American
Ingredients
- 1 1/2 cups heavy cream
- 1 1/2 cups whole milk
- 1 3/4 cups granulated sugar (divided)
- 1 teaspoon vanilla extract
- 3/4 cup orange juice
- 1/2 cup lime juice
- 8 ounces raspberries
Instructions
- Combine heavy cream, whole milk, and 1 cup of sugar in a saucepan over medium heat. Stir until sugar dissolves, about 5-7 minutes. Remove from heat and stir in vanilla extract. Cool completely.
- Blend raspberries with remaining sugar, strain through a fine mesh sieve to remove seeds.
- Pour cooled base into an ice cream maker and churn until it reaches soft serve consistency.
- Divide the mixture; mix one half with orange juice and food coloring, the other with lime juice and green food coloring.
- Layer mixtures alternately in a container and freeze for 4-6 hours until firm.
Nutrition
- Serving Size: 1/2 cup (125g)
- Calories: 220
- Sugar: 32g
- Sodium: 55mg
- Fat: 10g
- Saturated Fat: 6g
- Unsaturated Fat: 3g
- Trans Fat: 0g
- Carbohydrates: 31g
- Fiber: 1g
- Protein: 2g
- Cholesterol: 40mg