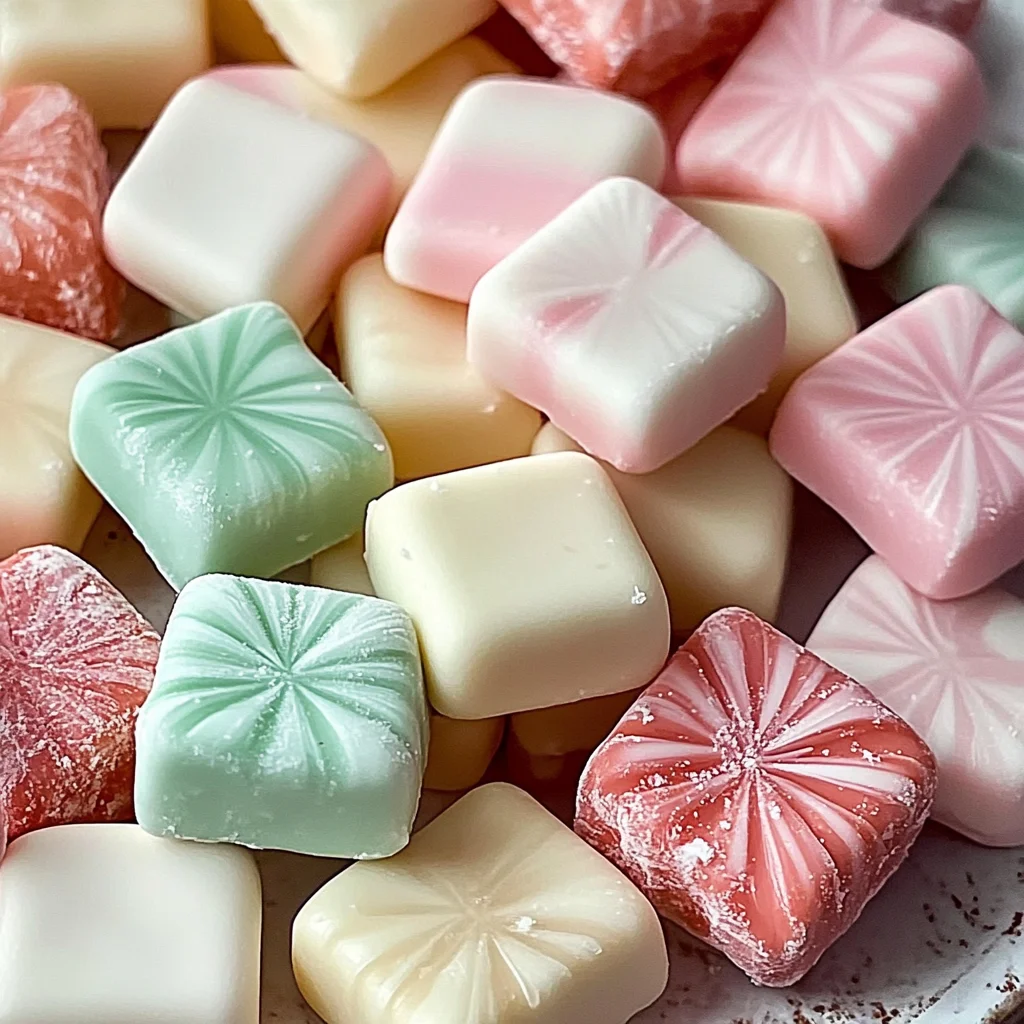
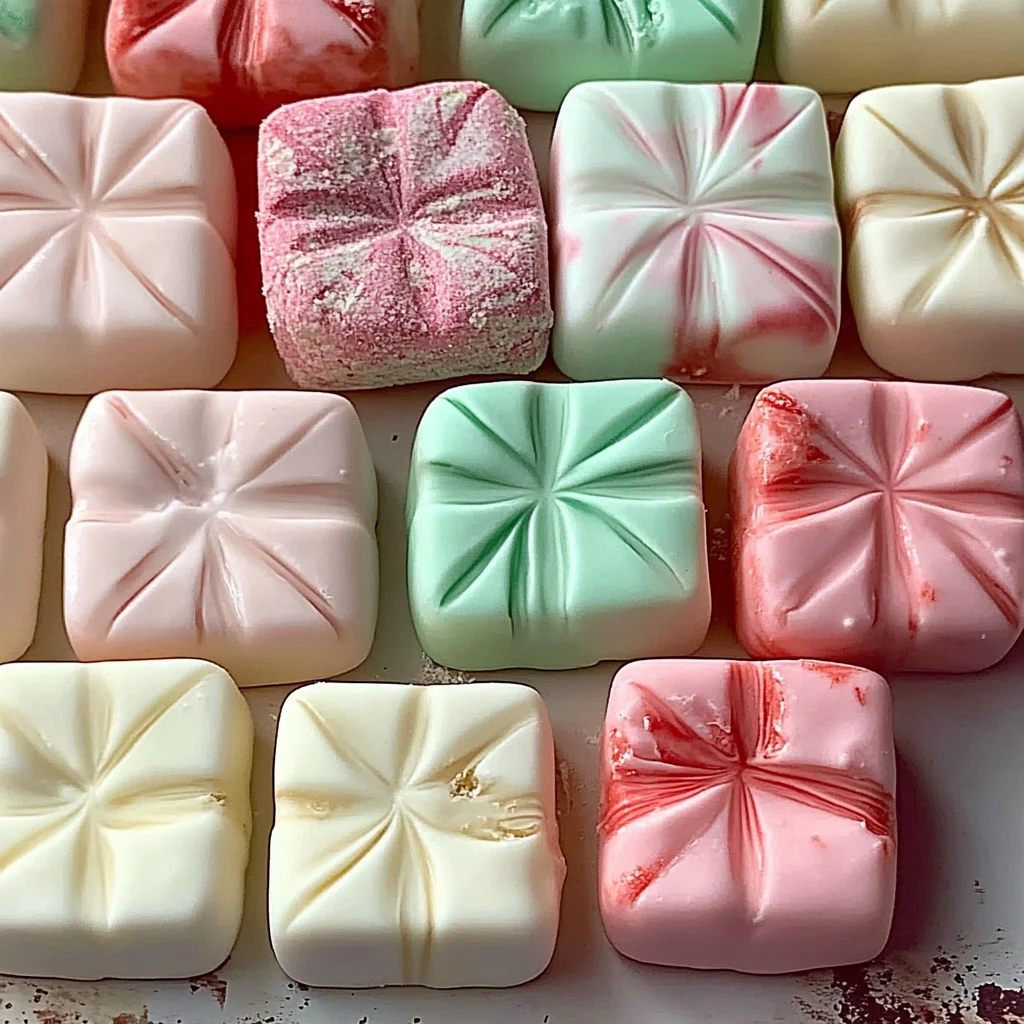
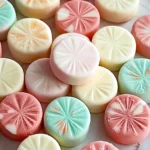
Old-Fashioned Butter Mints
Sweet, creamy, and nostalgic—these Old-Fashioned Butter Mints are the perfect bite-sized treat for any celebration. Whether you’re looking for a quick holiday candy, easy party favor, or vintage dessert idea, these mints check all the boxes. With a melt-in-your-mouth texture and just a kiss of peppermint, they bring back fond memories of family gatherings and dessert tables. No baking required, minimal ingredients, and customizable colors—ideal for anyone looking for a quick dessert or easy recipe to impress.
Why You’ll Love This Recipe
- Easy to Make: With just a few simple steps, you can whip up these delightful mints in no time.
- Versatile Treat: Customize colors to match your event theme or occasion effortlessly.
- No Baking Required: Perfect for those who want to create something sweet without turning on the oven.
- Ideal for Gifting: These mints make charming edible gifts that everyone will appreciate.
- Family-Friendly Fun: Great activity to involve kids in the kitchen while creating lasting memories.
Tools and Preparation
Before you get started on making your Old-Fashioned Butter Mints, gather your tools. Having everything ready will streamline the process and make it enjoyable.
Essential Tools and Equipment
- Mixing bowl
- Electric mixer or whisk
- Measuring cups
- Measuring spoons
- Scraper or knife
- Parchment paper
Importance of Each Tool
- Mixing bowl: Essential for combining ingredients smoothly.
- Electric mixer or whisk: Helps achieve the creamy texture needed for the perfect mints.
- Measuring cups: Ensures accurate ingredient quantities for consistent results.
Ingredients
For the Old-Fashioned Butter Mints
- 1/2 cup unsalted butter, softened
- 4 cups powdered sugar
- 1 tablespoon heavy cream or milk
- 1/2 teaspoon peppermint extract
- 1 pinch salt
- gel food coloring (optional)
How to Make Old-Fashioned Butter Mints
Step 1: Beat the Butter
Begin by beating the softened unsalted butter in a large mixing bowl until it becomes smooth and creamy.
Step 2: Add Flavorings
Next, add the peppermint extract, salt, and heavy cream or milk. Mix well until fully combined.
Step 3: Incorporate Sugar
Gradually mix in the powdered sugar. Continue mixing until a soft dough forms that holds together nicely.
Step 4: Color Your Mints (Optional)
If you’d like to add color, divide the dough into portions and knead in gel food coloring until you achieve your desired shade.
Step 5: Shape the Dough
Roll the dough into thin ropes on a surface dusted with powdered sugar. Aim for even thickness to ensure uniform mints.
Step 6: Cut into Pieces
Using a scraper or knife, cut the ropes into bite-sized pieces. Each piece should be small enough to pop into your mouth easily.
Step 7: Drying Time
Spread the cut mints onto parchment paper and allow them to dry at room temperature for about 8 hours or overnight. This helps them firm up nicely before serving.
How to Serve Old-Fashioned Butter Mints
Old-Fashioned Butter Mints are a delightful treat that can be enjoyed in various ways. Their charming appearance and sweet flavor make them perfect for any occasion. Here are some creative serving suggestions to enhance your experience with these nostalgic candies.
As Party Favors
- Present each mint in a small decorative bag or box for guests to take home as a sweet reminder of the event.
On Dessert Tables
- Arrange the mints in a beautiful glass jar or bowl, adding a pop of color that complements your other desserts.
In Gift Baskets
- Include Old-Fashioned Butter Mints in homemade gift baskets alongside other treats, such as cookies or chocolates, for a personalized touch.
With Coffee or Tea
- Serve the mints alongside hot beverages as a refreshing palate cleanser that pairs wonderfully with warm drinks.
At Weddings
- Place the mints at each table setting or create a candy buffet where guests can enjoy them during the reception.
During Holiday Celebrations
- Offer these mints as part of your holiday spread, adding joy and nostalgia to family gatherings and festive occasions.
How to Perfect Old-Fashioned Butter Mints
To achieve the best results with your Old-Fashioned Butter Mints, consider these helpful tips:
-
Use room temperature butter: Softened butter blends more easily, ensuring a smooth texture in your dough.
-
Sift powdered sugar: Sifting helps eliminate lumps, resulting in a finer texture for your mints.
-
Knead gently: When incorporating gel food coloring, knead softly to avoid overworking the dough, which can affect the mints’ consistency.
-
Allow ample drying time: Letting the mints dry properly at room temperature ensures they hold their shape and have the right texture when served.
-
Experiment with flavors: Feel free to try different extracts like spearmint or vanilla to customize the taste of your mints.
-
Store properly: Keep leftover mints in an airtight container at room temperature to maintain their freshness and flavor.
Best Side Dishes for Old-Fashioned Butter Mints
While Old-Fashioned Butter Mints make a delightful standalone treat, pairing them with complementary side dishes can elevate your dessert experience. Here are some great options:
-
Vanilla Ice Cream: A classic pairing that adds creaminess and balances the sweetness of the mints.
-
Fruit Salad: A refreshing mix of seasonal fruits offers brightness and acidity that contrasts nicely with sugary treats.
-
Cheese Platter: Include a variety of cheeses for a savory balance; sharp cheeses work particularly well with sweet candies.
-
Chocolate-Covered Pretzels: The salty crunch of pretzels dipped in chocolate provides an exciting textural contrast alongside the soft mints.
-
Mini Cupcakes: These bite-sized delights can be made in various flavors to complement your butter mints perfectly.
-
Nut Brittle: The crunchy texture and nutty flavor add another layer of enjoyment while harmonizing with the sweet nature of the mints.
-
Coffee Cake: A slice of moist coffee cake creates an inviting combination, pairing beautifully with both coffee and butter mints for dessert time.
-
Caramel Popcorn: The sweet and crunchy popcorn adds an element of fun that is sure to entertain guests at any gathering.
Common Mistakes to Avoid
When making Old-Fashioned Butter Mints, it’s easy to make a few common errors. Here are some mistakes to watch out for:
- Not softening the butter properly – Ensure the butter is at room temperature; this helps achieve a smooth and creamy texture.
- Skipping the salt – A pinch of salt enhances the flavor; without it, your mints may taste flat. Always include it in your mixture.
- Overmixing the dough – Mix only until combined; overmixing can lead to tough mints. Stop mixing as soon as a soft dough forms.
- Not allowing enough drying time – These mints need adequate time to dry, ideally 8 hours or overnight for the best texture. Be patient!
- Ignoring food coloring options – If you want vibrant mints, don’t skip adding gel food coloring. Divide the dough and knead in color for a fun twist.
Storage & Reheating Instructions
Refrigerator Storage
- Store mints in an airtight container.
- They can last up to 2 weeks in the refrigerator.
Freezing Old-Fashioned Butter Mints
- Place mints in a freezer-safe container or bag.
- They can be frozen for up to 3 months.
Reheating Old-Fashioned Butter Mints
- Oven – Preheat to low heat (around 200°F) and place mints on a baking sheet for a few minutes if they become too hard.
- Microwave – Heat in short bursts of 5-10 seconds until slightly softened, being careful not to melt them.
- Stovetop – Use a double boiler on low heat; gently warm while stirring until they soften.
Frequently Asked Questions
Here are some common questions about making Old-Fashioned Butter Mints:
How do I customize my Old-Fashioned Butter Mints?
You can easily customize these mints by adding different flavors like chocolate or almond extract instead of peppermint.
Can I use vegan butter in the recipe?
Yes, using plant-based butter is a great alternative that will give you similar results without dairy.
What is the best way to color my Old-Fashioned Butter Mints?
For vibrant colors, use gel food coloring. It blends well without altering consistency and you can mix different colors for fun designs!
How long do Old-Fashioned Butter Mints last?
When stored properly, these mints can last up to two weeks in the refrigerator or three months in the freezer.
Final Thoughts
Old-Fashioned Butter Mints are not only delicious but also versatile. Their nostalgic flavor makes them perfect for celebrations or as edible gifts. With endless customization options for flavors and colors, you’ll have fun creating your unique batch. Try this easy recipe today!
Old-Fashioned Butter Mints
Indulge in the nostalgic delight of Old-Fashioned Butter Mints, a sweet and creamy treat that’s perfect for any celebration. These delightful candies are incredibly easy to make, requiring no baking and just a handful of simple ingredients. With their melt-in-your-mouth texture and refreshing peppermint flavor, they evoke memories of family gatherings and festive dessert tables. Customize them with vibrant colors to match your event theme, making them the ideal party favor or edible gift.
- Prep Time: 15 minutes
- Cook Time: None
- Total Time: 0 hours
- Yield: Approximately 30 mints 1x
- Category: Dessert
- Method: No baking required
- Cuisine: American
Ingredients
- 1/2 cup unsalted butter, softened
- 4 cups powdered sugar
- 1 tablespoon heavy cream or milk
- 1/2 teaspoon peppermint extract
- 1 pinch salt
- Gel food coloring (optional)
Instructions
- In a mixing bowl, beat the softened unsalted butter until smooth and creamy.
- Add the peppermint extract, salt, and heavy cream or milk; mix until combined.
- Gradually incorporate the powdered sugar until a soft dough forms.
- If desired, divide the dough and knead in gel food coloring until you achieve your preferred color.
- Roll the dough into thin ropes on a powdered sugar-dusted surface.
- Cut the ropes into bite-sized pieces using a scraper or knife.
- Place the cut mints on parchment paper and let them dry at room temperature for about 8 hours or overnight.
Nutrition
- Serving Size: 2 mints (20g)
- Calories: 76
- Sugar: 16g
- Sodium: 12mg
- Fat: 3g
- Saturated Fat: 2g
- Unsaturated Fat: 1g
- Trans Fat: 0g
- Carbohydrates: 13g
- Fiber: 0g
- Protein: <1g
- Cholesterol: 10mg