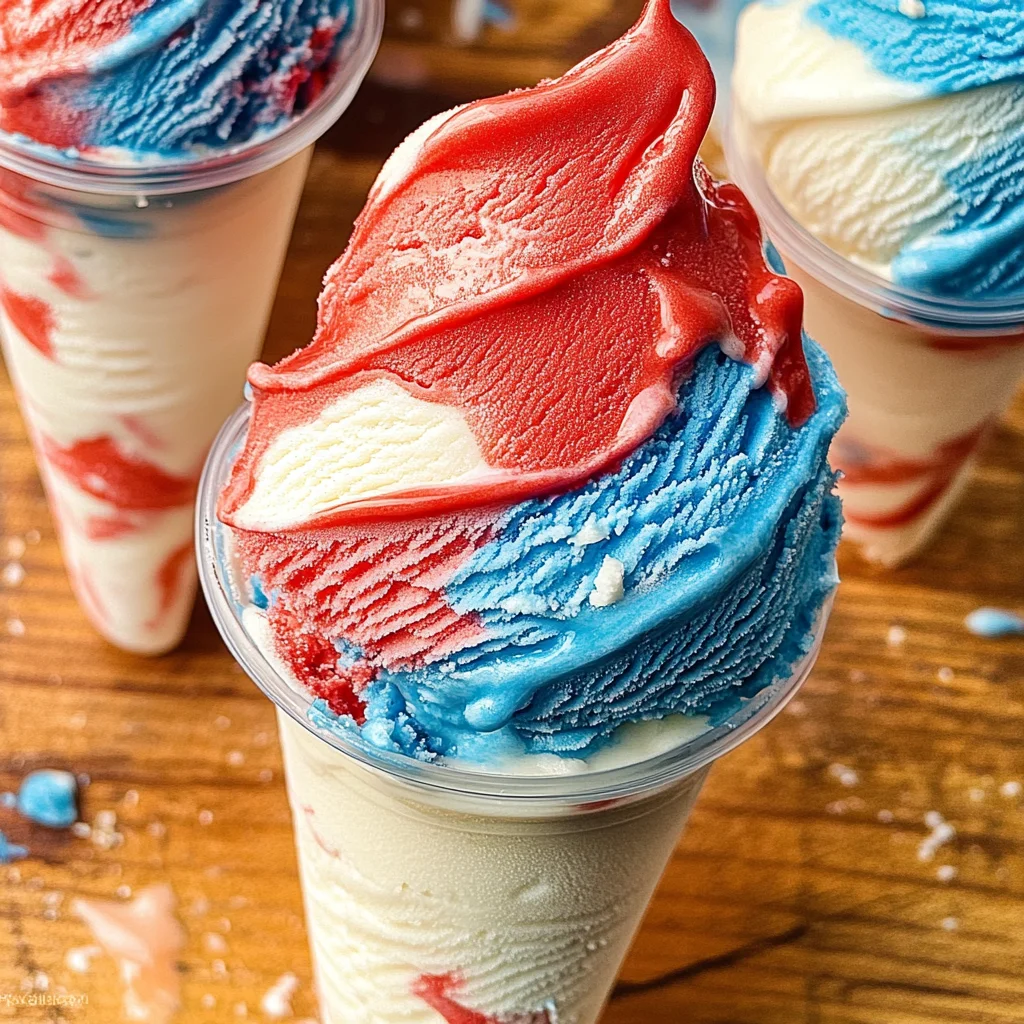
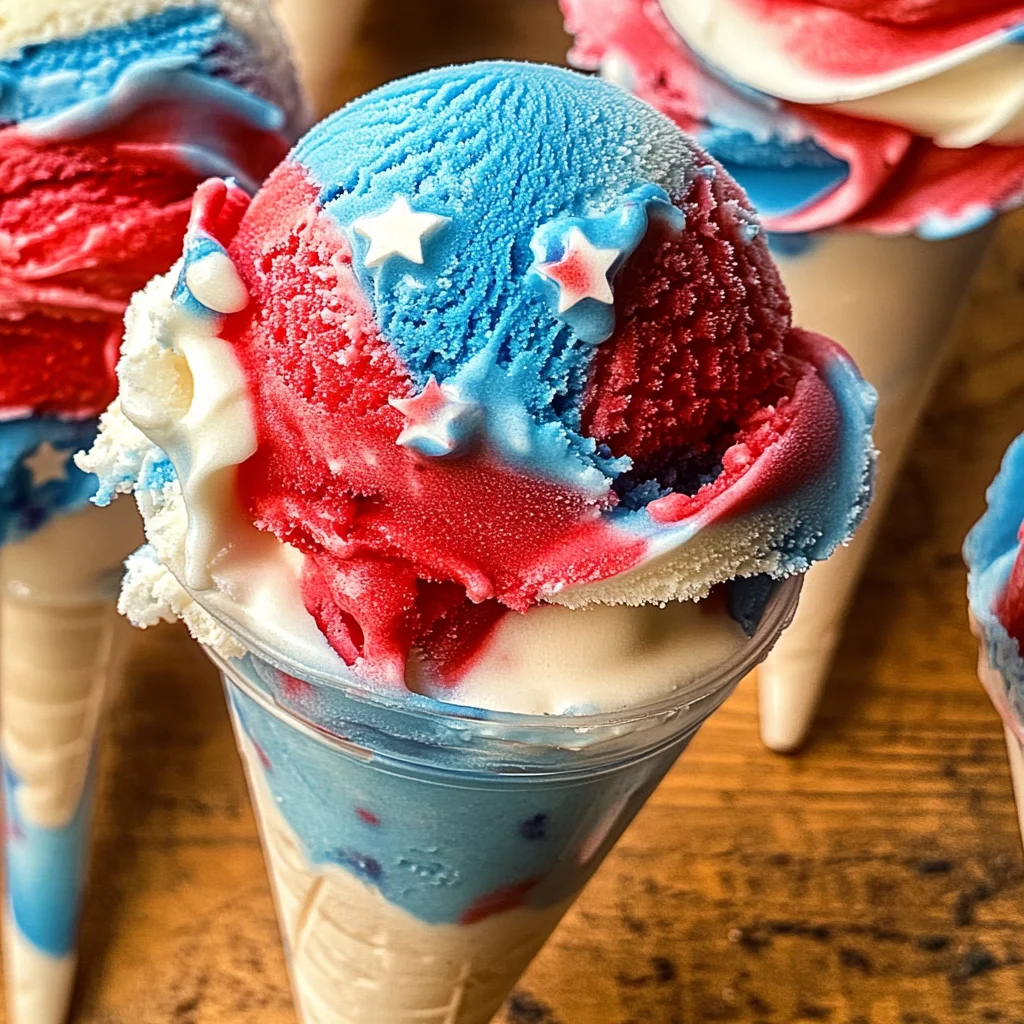
Red White and Blue Ice Cream
The Red White and Blue Ice Cream is a delightful summer treat that combines the creamy goodness of vanilla ice cream with vibrant colors. This no-churn recipe is perfect for barbecues, picnics, or any festive occasion. With its striking colors and rich flavors, it’s sure to impress both kids and adults alike. Plus, it’s a fun and easy way to celebrate summer holidays!
Why You’ll Love This Recipe
- Easy to Make: With no churning required, this recipe simplifies the ice cream-making process.
- Festive Appeal: The red, white, and blue colors make it a hit at holiday celebrations like the 4th of July.
- Customizable Flavors: You can easily adjust the flavor by adding different extracts or toppings.
- No Special Equipment Needed: Just a bowl and a whisk are all you need to create this delicious dessert.
- Perfect for Any Occasion: Whether it’s a family gathering or a summer party, this ice cream fits right in.
Tools and Preparation
To whip up your Red White and Blue Ice Cream, gather some essential tools that will make the process smooth and enjoyable.
Essential Tools and Equipment
- Large mixing bowl
- Whisk or electric mixer
- Loaf pan or container
- Measuring cups and spoons
Importance of Each Tool
- Large mixing bowl: Provides ample space for mixing ingredients without spills.
- Whisk or electric mixer: Ensures that the whipping cream reaches stiff peaks for a fluffy texture.
- Loaf pan or container: Ideal for freezing the ice cream mixture evenly.
Ingredients
This recipe features simple yet delicious ingredients that come together for an unforgettable treat.
For the Ice Cream Base
- 2 cups very cold heavy whipping cream
- 1 can (14 oz sweetened condensed milk
- 2 teaspoons pure vanilla extract
For Coloring
- Food coloring – Red (White and Blue)
How to Make Red White and Blue Ice Cream
Step 1: Prepare Your Freezer Items
Place your loaf pan or container in the freezer for at least 30 minutes. Also, place your mixing bowl and whisk in the freezer during this time to ensure everything is very cold.
Step 2: Whip the Cream
Ensure your whipping cream and sweetened condensed milk are really cold. In a large bowl, beat the whipping cream until stiff peaks form. This step is crucial for creating a light texture.
Step 3: Combine Ingredients
In another medium bowl, combine the sweetened condensed milk with pure vanilla extract until smooth. Gradually add this mixture to the whipped cream by gently folding it in to maintain airiness.
Step 4: Color the Mixture
Divide your mixture into three separate bowls, each with about 2 cups. Add food coloring to each bowl—red, white (leave as is), and blue—and gently fold until well combined.
Step 5: Layer in Container
Remove your container from the freezer. Drop spoonfuls of each colored ice cream mixture into the container alternately. Create layers as desired—make it fun!
Step 6: Freeze Overnight
Cover your container tightly with plastic wrap or a lid. Freeze overnight until solid. When ready to serve, scoop out your beautiful Red White and Blue Ice Cream!
How to Serve Red White and Blue Ice Cream
Red White and Blue Ice Cream is a delightful dessert that captures the spirit of summer gatherings and festive celebrations. Here are some fun serving suggestions to elevate your dessert experience.
Ice Cream Sundae Bar
- Create a DIY sundae bar with various toppings like sprinkles, chocolate syrup, and fresh fruits. Guests can customize their sundaes with their favorite additions.
Patriotic Cones
- Serve scoops of Red White and Blue Ice Cream in waffle cones. For extra flair, dip the cone’s edges in melted white chocolate and sprinkle with colored sugar.
Layered Dessert Cups
- In clear cups, layer Red White and Blue Ice Cream with crushed cookies or fruity sauces. This adds an appealing visual element and enhances the flavor.
Frozen Fruit Garnish
- Top each serving with fresh berries like strawberries or blueberries. The fruit not only complements the ice cream but also adds a refreshing touch.
Party Platter
- Arrange scoops of Red White and Blue Ice Cream on a large platter with assorted toppings around it. This makes for an eye-catching centerpiece for your dessert table.
How to Perfect Red White and Blue Ice Cream
To achieve the best texture and flavor for your Red White and Blue Ice Cream, consider these tips.
- Use chilled equipment: Ensure your mixing bowl and whisk are chilled to help whip the cream efficiently.
- Fold gently: When combining the whipped cream with condensed milk, fold gently to maintain airiness for a light texture.
- Color evenly: When adding food coloring, fold it in slowly so you achieve uniform color without overmixing.
- Freeze properly: After mixing, freeze the ice cream overnight for optimal firmness. A longer freezing time improves texture.
- Serve cold: Let the ice cream sit at room temperature for a few minutes before serving to make scooping easier.
Best Side Dishes for Red White and Blue Ice Cream
Pairing side dishes with your Red White and Blue Ice Cream can create a well-rounded dessert experience. Here are some great options:
- Fruit Salad: Fresh seasonal fruits provide a light contrast to the rich flavors of ice cream.
- Brownie Bites: Chewy brownie pieces add a decadent touch that pairs beautifully with creamy ice cream.
- Chocolate Chip Cookies: Classic cookies offer a crunchy texture that complements the smoothness of the ice cream.
- Pineapple Skewers: Grilled pineapple skewers bring sweet caramelized flavors that enhance the overall dessert theme.
- Mini Cheesecakes: Individual cheesecakes provide a tangy balance to sweet ice cream, making for an enjoyable combination.
- Rice Krispie Treats: These chewy treats are easy to make and add a playful twist alongside your ice cream servings.
Common Mistakes to Avoid
Creating your own Red White and Blue Ice Cream can be delightful, but there are a few common pitfalls to watch out for.
- Overbeating the Cream: Be careful not to overbeat the heavy whipping cream. Stop once stiff peaks form; otherwise, the ice cream will become grainy.
- Using Warm Ingredients: Ensure all ingredients, especially the whipping cream and sweetened condensed milk, are very cold. Warm ingredients can lead to a less creamy texture.
- Skipping the Freezing Step: Don’t skip pre-freezing the bowl and container. This helps achieve the right texture. If you do, your ice cream may not set properly.
- Not Folding Gently: When combining mixtures, fold gently to maintain airiness. Aggressive mixing will deflate your whipped cream.
- Ignoring Freezing Time: Allow the ice cream to freeze overnight for best results. Rushing this step will result in a softer consistency.
Storage & Reheating Instructions
Refrigerator Storage
- Store in an airtight container for up to 3 days.
- Keep it at the back of the fridge for optimal temperature.
Freezing Red White and Blue Ice Cream
- Freeze in an airtight container for up to 2 months.
- Use parchment paper on top of the ice cream before sealing for extra freshness.
Reheating Red White and Blue Ice Cream
- Oven: Not recommended as ice cream should be served frozen.
- Microwave: Use low power for just a few seconds to soften slightly before serving.
- Stovetop: Not applicable; ice cream is best enjoyed frozen.
Frequently Asked Questions
Here are some common questions about making and enjoying Red White and Blue Ice Cream.
Can I use different colors for my Red White and Blue Ice Cream?
Yes! Feel free to experiment with any food coloring that fits your theme or preference.
How long does it take to make Red White and Blue Ice Cream?
The total time includes prep and freezing time, totaling about 8 hours, primarily due to overnight freezing.
What if I don’t have heavy whipping cream?
You can substitute it with coconut cream for a dairy-free version, but it may alter the flavor slightly.
Can I add toppings to Red White and Blue Ice Cream?
Absolutely! Fresh fruit, chocolate chips, or sprinkles make great additions when serving.
Is Red White and Blue Ice Cream suitable for parties?
Definitely! This dessert is visually appealing and perfect for summer gatherings or patriotic celebrations!
Final Thoughts
This Red White and Blue Ice Cream is not only a fun treat but also highly customizable. You can play with colors or even mix in your favorite add-ins like nuts or candies. Try this festive dessert at your next gathering, and delight your guests with its refreshing flavors!
Red White and Blue Ice Cream

Celebrate summer with this vibrant Red White and Blue Ice Cream, a delightful no-churn treat perfect for any festive occasion. Combining creamy vanilla flavors and striking colors, this easy-to-make dessert will impress both kids and adults alike. Ideal for barbecues, picnics, or any gathering, it’s a refreshing way to enjoy the season. With its customizable nature, you can experiment with different flavors and toppings to suit your preferences. This layered ice cream is not just delicious; it also makes for an eye-catching centerpiece at any dessert table.
- Prep Time: 15 minutes
- Cook Time: 0 minutes
- Total Time: 15 minutes
- Yield: Approximately 6 servings 1x
- Category: Dessert
- Method: No-Churn
- Cuisine: American
Ingredients
- 2 cups very cold heavy whipping cream
- 1 can (14 oz) sweetened condensed milk
- 2 teaspoons pure vanilla extract
- Food coloring (red and blue)
Instructions
- Chill your loaf pan and mixing bowl in the freezer for 30 minutes.
- In the chilled bowl, whip the heavy cream until stiff peaks form.
- In a separate bowl, mix together sweetened condensed milk and vanilla extract until smooth.
- Gently fold the condensed milk mixture into the whipped cream.
- Divide the mixture into three bowls; add red food coloring to one and blue to another, leaving one plain.
- Drop spoonfuls of each color into the prepared container, layering as desired.
- Freeze overnight until solid.
Nutrition
- Serving Size: 1/2 cup
- Calories: 250
- Sugar: 23g
- Sodium: 50mg
- Fat: 18g
- Saturated Fat: 11g
- Unsaturated Fat: 6g
- Trans Fat: 0g
- Carbohydrates: 23g
- Fiber: 0g
- Protein: 3g
- Cholesterol: 60mg